Thank you for choosing Made in the USA products, its helps our small business so much!

Crafting a Custom End-Grain Inlaid Cutting Board: A Work of Art for Your Kitchen
Blog post description.
3/20/20251 min read
There’s something special about making your own cutting board. It’s not just another slab of wood—it’s a piece of functional art, built to last and designed to impress. And when you add inlays? That’s when you take it to the next level.
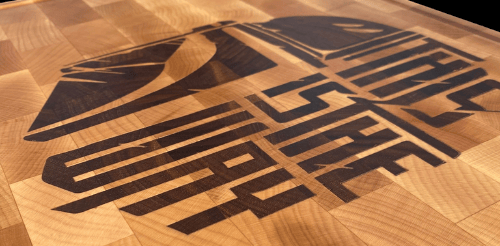
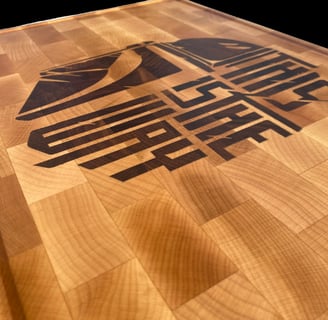
End-grain cutting boards are already a top-tier choice. They’re gentle on your knives, self-healing, and just plain gorgeous. But when you incorporate an inlay, whether it’s a bold geometric pattern or a personal touch like a logo or initials, you’ve got something truly one-of-a-kind.
The Process: From Rough Lumber to Showstopper
1. Choosing Your Wood
Start with hardwoods like maple, walnut, cherry, or even exotic woods for contrast. End grain brings out the best in these species, showcasing their rich patterns and natural durability.
2. Prepping & Gluing
Milling is key here. Every board needs to be perfectly flat and square before glue-up. Once that’s set, you can start thinking about your inlay design. Whether you’re using a CNC machine for precision or going old-school with chisels, planning ahead is everything.
3. The Inlay Magic
This is where the board gets its personality. Maybe it's a simple stripe of contrasting wood, or maybe you're going bold with a detailed emblem. Either way, careful cutting and fitting ensure a seamless look—like the design was always meant to be there.
4. The Final Touches
Once everything is glued and dried, it’s time to cut the board into end-grain sections, flip them upright, and reassemble. This step is what gives end-grain boards that signature checkerboard look and incredible durability. After a final round of sanding (LOTS of sanding), apply a rich coat of food-safe oil and watch the grain come to life.